How to Make a Custom 3D Figurine From a Photo
A small figurine of your dog, your kid's drawing or yourself makes a great gift. You can have one made, or make it yourself for the price of some filament. This guide compares the three ways to get a 3D model from a photo, then shows how to print and paint it so it looks good on a shelf.
By the Bake3D teamUpdated 6 min read
Short answer
To make a custom figurine from a photo, first turn the photo into a 3D model. Use an AI image to 3D tool for one photo, a phone scanning app for a real person or object that can hold still, or a paid service that sculpts it for you. Then export the model as STL, check it for holes and thin parts, and print it. Resin gives the finest detail on small figurines. Filament is fine for larger ones.
How we checked this: The AI steps come from the Bake3D studio, including its STL export of the current pose. The phone scanning numbers come from RealityScan, Polycam and KIRI Engine's own pages. The printing numbers come from Formlabs, Prusa, Anycubic and Elegoo documentation, all read on 25 September 2026. We did not compare the likeness of different AI tools.
Every custom figurine starts the same way. A flat photo has to become a 3D shape with a front, a back, sides and a base. Once you have that shape as an STL file, printing it is the easy part.
Three ways to turn a photo into a figurine
| AI from one photo | Phone photo scan | Paid service | |
|---|---|---|---|
| What you need | One clear photo | Dozens of photos, all around the subject | A few good photos |
| Works for | Pets, people, characters, drawings | Real people and objects that hold still | Anyone |
| Time | Minutes for the model | About an hour, plus processing | Often several weeks |
| Cost | Free trial or credits | Free apps exist | The highest of the three |
| Likeness | Good shape, guessed back | Very close to the real thing | Depends on the artist |
Way 1: AI image to 3D from one photo
AI image to 3D tools predict a full 3D model from one picture. They are the only quick way to make a figurine of a pet that will not sit still, a drawing, or a character that does not exist.
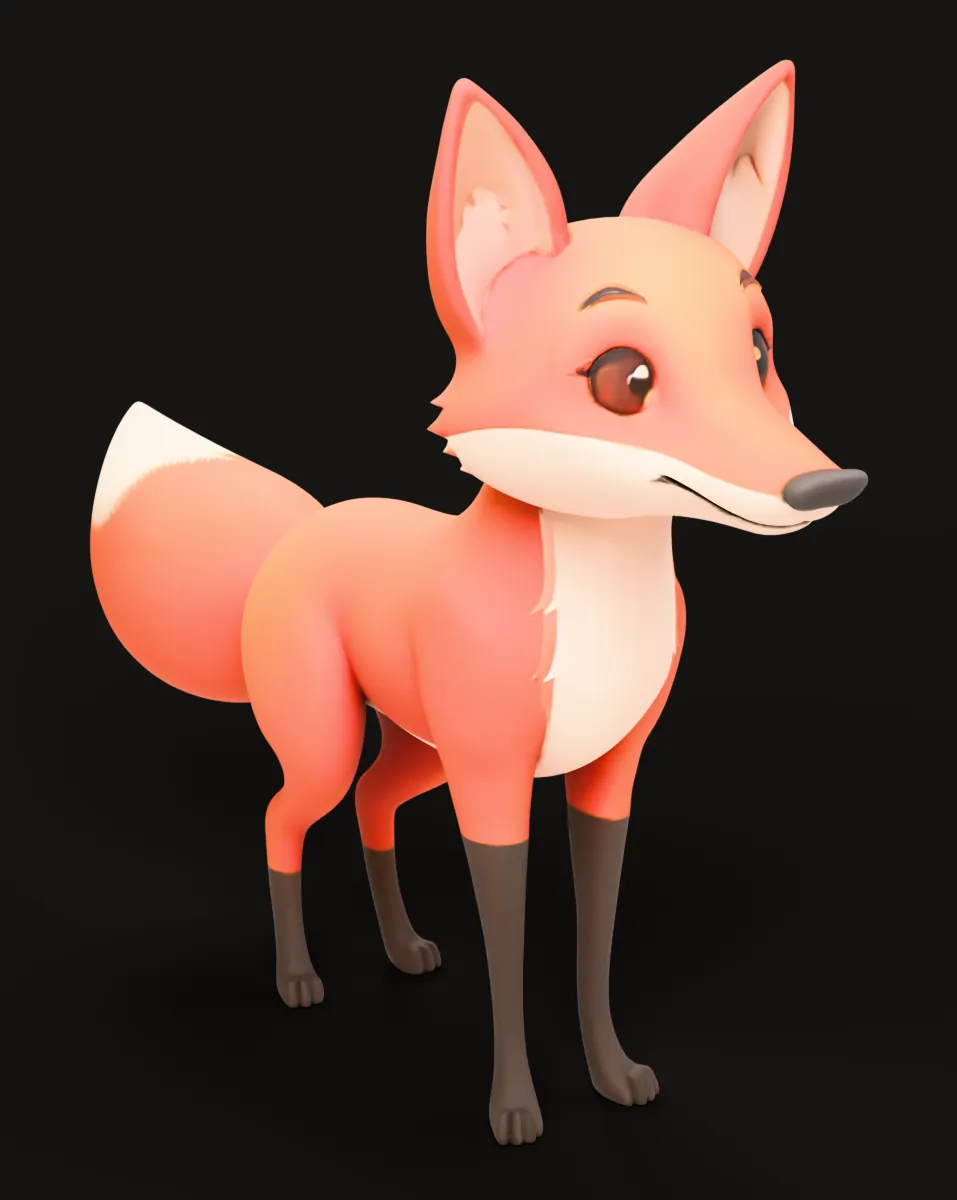
Here is how it works in Bake3D:
- Choose the photo. The whole subject should be in the frame, on a plain background, with even light.
- Upload it in the studio. Pick a quality level. Standard costs 40 credits, and adding a rig costs 25 more. New accounts get 70 free credits, which covers both.
- Check the model from every side. The studio shows seven views, including the back and the bottom.
- Pick a pose. With a rig, you can play a motion, like a head turn or a walk, and pause on the frame you like. You can also describe a pose in words, like “sit down and look up”.
- Export an STL. The STL export saves the model in its current pose, ready for a slicer.
Good photo tips for pets: get down to the pet’s eye level. Shoot from the side or at a three-quarter angle, with all four legs visible. Avoid harnesses and toys that hide the body.
Be honest about the limits. From one photo, the back of the model is a smart guess. A human face will look like the person in shape and style, but it may not be a perfect likeness. Adding two to four photos from other angles, as extra views, gives the AI less to guess.
Way 2: Scan the real thing with your phone
Photo scanning, also called photogrammetry, builds a model from many photos taken all around a real object. It measures the shape instead of guessing it. It needs the subject to stay completely still, so it works best for people who can hold a pose, statues, toys and keepsakes.
Popular free options:
- RealityScan Mobile from Epic Games is free on iPhone and Android. It starts processing after 20 photos and allows up to 300 per scan. Its guide asks for about 70% overlap between photos and no more than 30 degrees between neighboring shots.
- KIRI Engine has a free plan with up to 150 photos per scan and unlimited free export.
- Polycam has a free plan, but it only exports GLTF. STL and OBJ export need a paid plan.
To get a good scan, walk slowly around the subject in a full circle. Then do a second circle higher up and a third one lower down. Use soft, even light and avoid shiny surfaces.
Way 3: Pay a service
Many shops sculpt and print a figurine from a few photos you send them. An artist builds the model by hand, then prints and often paints it. This costs the most and usually takes weeks, but you do not need a printer or any 3D skills.
Choose a size
| Size | Height | Good for |
|---|---|---|
| Tabletop miniature | 28 or 32 mm | Board games and role-playing games |
| Desk figurine | 80 to 150 mm | Gifts, pets, characters |
| Display bust | Head and shoulders, often 1:10 scale | Portraits of people |
Miniature sizes are a hobby habit, not a strict standard. Brands measure them in different ways.
Smaller figurines hide fewer mistakes. Thin parts like tails, ears, whiskers and fingers can become too thin to print when you shrink the model.
Resin or filament?
| Resin (SLA or MSLA) | Filament (FDM) | |
|---|---|---|
| Detail | Very fine. Formlabs cites layers as thin as 25 microns | Visible layer lines |
| Thinnest wall | About 0.2 mm | About 1 mm, and 1.2 mm is safer with a 0.4 mm nozzle |
| Best size | Small figurines and miniatures | Larger figurines |
| Mess and safety | Liquid resin; wear gloves and work in a ventilated room | Simple and clean |
For small figurines on a filament printer, Prusa suggests a 0.25 mm nozzle with 0.07 or 0.1 mm layers, printing slower and about 5 degrees cooler.
Prepare the model for printing
- Check it for holes. Open the STL in our free STL checker. It shows open edges, flipped faces and the real size in millimetres.
- Thicken thin parts. Tails, ears and whiskers often need to be thicker than in real life. Check them against the wall thickness numbers above.
- Add a base. A flat, round base keeps the figurine standing and gives it a finished look.
- Hollow it for resin, if it is bigger than a few centimetres. A solid resin print wastes resin. Formlabs hollowed a bust with 2 mm walls and saved 77% of the resin.
- Add at least two drain holes to a hollow resin model. Formlabs says to put one as close to the build plate as possible. The holes let trapped resin out and stop suction during the print.
- Set the scale on purpose. AI models often come in with their own sizes. Check the height in your slicer.
Paint and finish
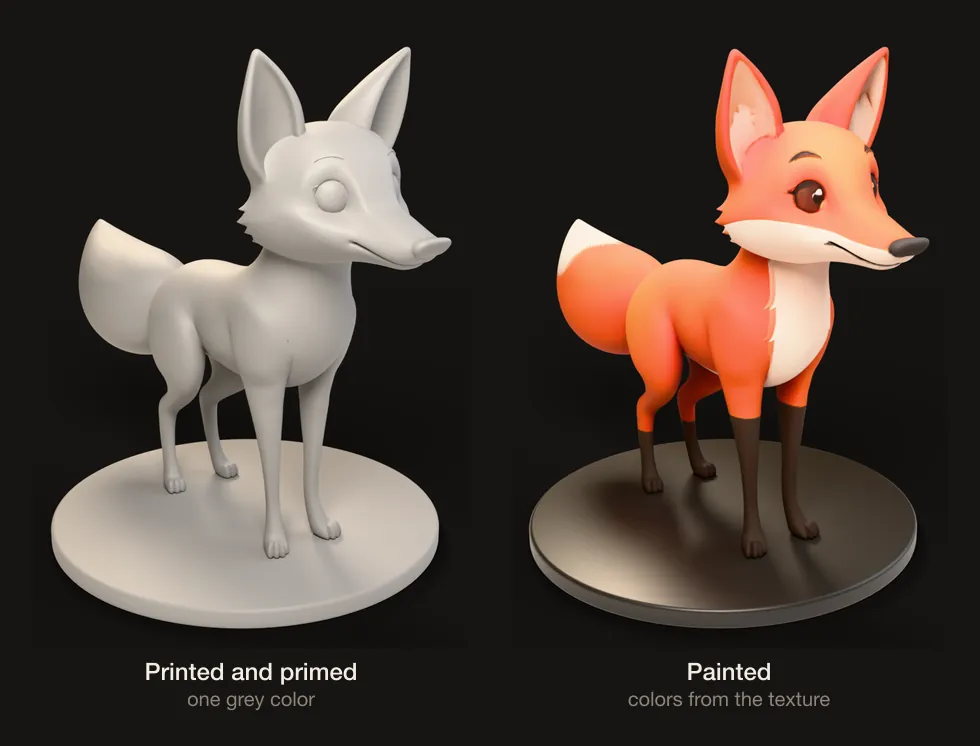
Formlabs suggests this order for figurines:
- Remove the supports.
- Sand the support marks and any rough spots.
- Spray a primer.
- Paint with acrylic paint or spray paint.
- Seal it with a clear topcoat.
A printer that can switch colors can also print the colors directly. Save the project as 3MF to keep the colors. See 3MF vs STL.
A note on people and characters
Before you sell a figurine, think about rights. Ask the person before you sell their likeness. Famous characters belong to their owners, so selling figurines of them can break copyright or trademark rules. Figurines of your own pet, your family for personal gifts, or your own characters are the safe choice. Our guide on selling 3D models covers marketplace rules.
Start with a photo
The fastest way to see if your idea works is to try it. Upload a photo on the image to 3D page, check the model from every side, pose it and export the STL. For a flat alternative, like a glowing photo panel, see how to make a lithophane.
Questions people ask
How much does a custom figurine from a photo cost?
Doing it yourself costs the filament or resin, plus the 3D model. Many AI tools have a free trial. Bake3D gives new accounts 70 free credits, enough for one model. Paid services that sculpt and print a figurine for you charge much more, and set their own prices.
Can I make a figurine of my dog or cat?
Yes. Use a clear photo of the whole animal, standing, from the side or at a three-quarter angle, on a plain background. AI image to 3D works well for pets, because they rarely hold still long enough for a photo scan.
How many photos do I need?
AI image to 3D needs one photo, and a few extra views help. Phone photo scanning needs many. RealityScan analyzes a scan after 20 photos and allows up to 300.
Should I print a figurine in resin or filament?
Resin for small figurines with fine detail, like faces and fur. Formlabs says resin printers can print layers as thin as 25 microns. Filament is cheaper and easier to handle, and works well for figurines about 10 cm tall or more.
How big should the figurine be?
Tabletop game miniatures are usually 28 or 32 mm tall. A desk figurine is often 8 to 15 cm tall. Bigger prints show more detail but take longer and use more material.
Sources
About this guide
Written and kept up to date by the Bake3D team. We build a tool that turns one image into a textured, rigged and animated 3D model, and we test the steps in our guides on our own files. First published . See how we write and check guides, or send a correction to hello@bake3d.ai.
Keep reading
Image to 3D
How to Turn a 2D Image Into a 3D Model
Three ways to turn a picture into a 3D model: AI from one image, photo scanning from many photos, or modeling by hand. Steps, costs and limits.
3D printing
How to Make an STL File for 3D Printing
Five ways to make an STL file: from a photo, a logo, a quick design, an existing 3D model or an AI tool. Plus how to check it before you print.
3D printing
How to 3D Print a Picture: Relief, Lithophane or Full Model
Three ways to 3D print a photo or picture: a raised relief, a backlit lithophane or a full 3D model. Settings, checks and limits for each one.