How to Make a Character Turnaround Sheet
A turnaround sheet shows one character from several sides, all lined up. It is the best reference a 3D artist can get, and in 2026 it is also the best input for multi-view AI 3D tools. This guide shows which views to draw, how to line them up, and how to use the sheet in Blender or an image to 3D tool. A free printable template is included.
By the Bake3D teamUpdated 6 min read
Short answer
A character turnaround sheet shows the same character from the front, three-quarter front, side, three-quarter back and back, drawn at the same size and in the same pose. Draw horizontal guide lines across the page for the top of the head, the eyes, the chin, the shoulders, the waist, the knees and the feet, and keep every view on those lines. Use a neutral pose, such as an A-pose, and flat views without perspective, so a 3D artist or an AI tool can read the shape.
How we checked this: The drawing conventions are the ones character designers commonly use. The Blender steps follow the Blender manual. The multi-view input rules come from Bake3D's studio and from the Tripo, Meshy and Hyper3D API docs, read on 25 September 2026. The template was drawn by us and is free to use.
One drawing of a character leaves a lot of questions. How long is the ponytail at the back? How thick is the body from the side? What does the backpack look like? A turnaround sheet answers all of them on one page, so a 3D artist, an animator or an AI tool does not have to guess.
What is a character turnaround sheet?
A turnaround sheet, also called a model sheet or a character sheet, shows one character from several angles. Each view is drawn at the same size, in the same pose, next to each other. Imagine the character standing on a slow turntable while you draw it every few steps.
Animation studios have used model sheets for decades to keep a character looking the same across many artists. 3D modelers use them as a blueprint. Now, multi-view AI tools use them to build a 3D model with less guessing.
Which views to draw
| View | What it shows | Needed for 3D |
|---|---|---|
| Front | Width, face, the whole outline | Yes |
| Three-quarter front | How the front and side connect | Helpful |
| Side | Depth, posture, the profile of the face | Yes |
| Three-quarter back | How the back and side connect | Helpful |
| Back | Hair, clothing, tails, packs | Strongly recommended |
If you only have time for two, draw the front and the side. If you have time for three, add the back.
How to line up the views
The views only work if they agree with each other. The eyes in the front view must be at the same height as the eyes in the side view. Here is how to make sure of that:
- Draw guide lines across the whole page before you draw the character. Mark the top of the head, the eyes, the chin, the shoulders, the chest, the waist, the hips, the knees, the ankles and the ground.
- Draw each view on those lines. The chin sits on the chin line in every view.
- Keep the same height. Every view stands on the same ground line and reaches the same head line.
- Draw flat, not in perspective. Imagine looking from very far away, so near and far parts are the same size.
- Use a center line in each view, running from the top of the head to the ground.
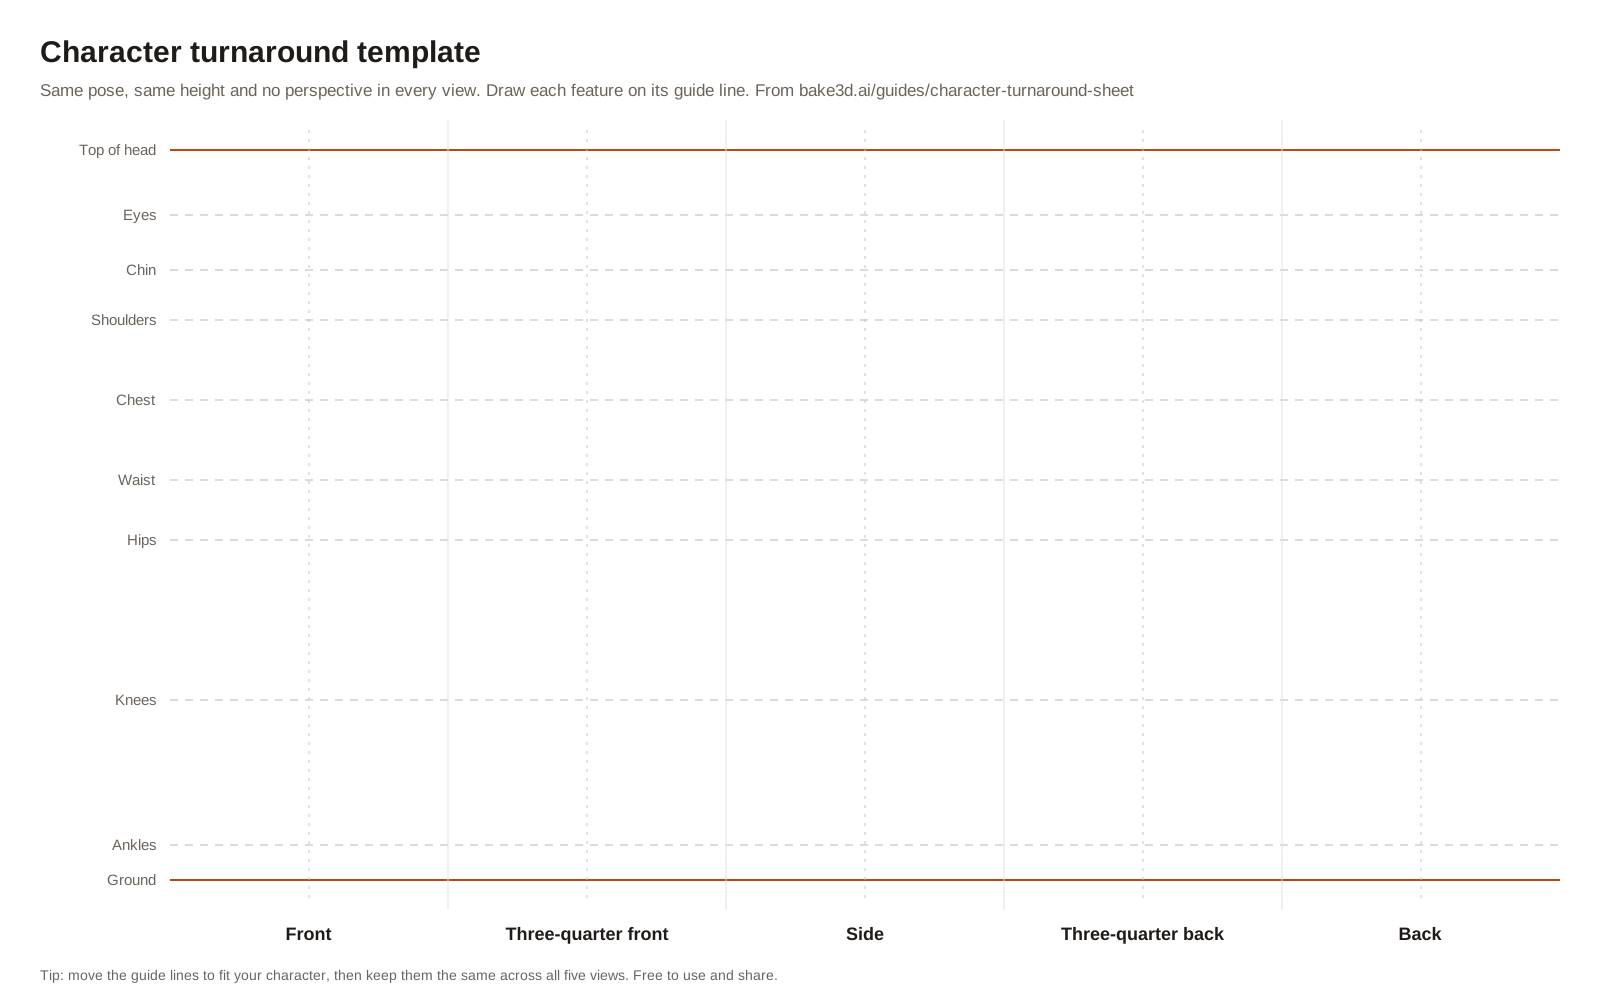
You can download this turnaround template and print it, or open it in any drawing app. It is free to use and share.
Step by step: draw a turnaround
- Start with the front view. It is the easiest to get right. Use a neutral pose.
- Set your guide lines from the front view. Put a line at every key feature.
- Draw the side view next to it, using the same lines. Think about depth: how far the nose, chest and feet stick out.
- Draw the back view. Its outline is a mirror of the front, so trace the outline and add the back details.
- Add the three-quarter views if you want them. They are the hardest, so do them last.
- Check every line. Hold a ruler across the page. Do the eyes, shoulders and knees line up in every view?
- Add flat color. Keep shading light and even, so colors are clear.
- Add short notes off to the side: colors, materials, and the character’s height if it matters.
Keep the same pose in every view
The pose must not change between views. If the left arm is raised in the front view, it must be raised in the side and back views too. The easiest way is a neutral pose:
- Standing straight, facing forward.
- Arms angled down and away from the body, in a relaxed A-pose.
- Legs a little apart.
- Hands open.
- A calm, neutral face.
Our guide on A-pose vs T-pose explains why this pose rigs well.
Turnarounds for animals, creatures and machines
- Four-legged animals: the side view is the most important, because it shows the length of the body and how the legs bend. Add a front view and a top view if you can.
- Winged creatures: draw the wings half open in every view, so you can see how they attach.
- Vehicles and robots: use front, side, back and top views, like a blueprint. Line up wheels, axles and joints across the views.

Use a turnaround in Blender
A turnaround sheet makes 3D modeling in Blender much easier.
- Cut the sheet into separate images: one for the front, one for the side, one for the back.
- In Blender, add each image as a Reference image empty. The front goes in the front view, the side in the side view.
- In the image settings, turn on Show in Orthographic and Only Axis Aligned. Now each image only shows when you look straight from its side.
- Scale the images so the heights match.
- Model on top of the images, switching between front and side views as you go.
Use a turnaround for AI image to 3D
Multi-view AI tools take several pictures of one subject and build one model from all of them. A turnaround sheet is the perfect input, once you prepare it.
- Cut it into one image per view. Most tools want separate files.
- Remove labels, arrows and notes. The AI may read them as part of the character.
- Use a plain background and the same lighting in every view.
- Crop each view the same way, with the whole character inside.
- Upload the front view first. Several tools treat the first image as the main view.
Different tools accept different sets of views:
| Tool | Views it accepts |
|---|---|
| Bake3D | Two to four reference views of the same subject, for 10 extra credits |
| Tripo | Front, left, back and right; the front is required, and at least two in total |
| Meshy | One to four images; the first is the main view |
| Hyper3D Rodin | One to five images; the first sets the materials |
With extra views, the AI has less to guess. The back of the model, in particular, comes out much closer to what you drew.
Common turnaround mistakes
- Using perspective, so the views do not line up.
- Letting features drift, like eyes that are higher in the side view than in the front.
- Changing the pose between views.
- Arms touching the body, which makes the 3D model fuse them together.
- Heavy shadows, which read as dents or holes.
- Views of different sizes on the same page.
- Labels on top of the character, which confuse AI tools.
Once your sheet is ready, turn it into a model on the image to 3D page, or read how to turn a 2D image into a 3D model for the other options.
Questions people ask
What views are in a character turnaround?
The usual set is front, three-quarter front, side, three-quarter back and back. For 3D modeling, the front, side and back matter most. The three-quarter views help people understand the shape.
How many views do I need for 3D modeling?
Two views, front and side, are the minimum. Three, with the back, is much better. Multi-view AI tools usually accept two to four views. Bake3D accepts two to four reference views of the same subject.
Should a turnaround sheet be drawn in perspective?
No. Draw each view flat, as if seen from very far away. Perspective makes near parts bigger than far parts, so the views stop lining up.
What pose should a turnaround use?
A neutral standing pose, the same in every view. For people, a relaxed A-pose with the arms away from the body and the legs a little apart works well. See A-pose vs T-pose.
Can AI make a 3D model from a turnaround sheet?
Yes. Cut the sheet into one image per view, with the same size and a plain background, then upload them as the views of one subject. Remove labels and arrows first, because the AI may treat them as part of the character.
Sources
About this guide
Written and kept up to date by the Bake3D team. We build a tool that turns one image into a textured, rigged and animated 3D model, and we test the steps in our guides on our own files. First published . See how we write and check guides, or send a correction to hello@bake3d.ai.
Keep reading
Image to 3D
How to Turn a 2D Image Into a 3D Model
Three ways to turn a picture into a 3D model: AI from one image, photo scanning from many photos, or modeling by hand. Steps, costs and limits.
Rigging basics
A-Pose vs T-Pose: Which Is Better for Rigging?
A-pose and T-pose compared: how each one changes shoulders, rigging and animation, and which pose to use when you make a model with AI.
Start here
From one image to a rigged 3D character
Prepare an image, generate a textured 3D model, check its rig and create an animation you can export to your editor.